
GEMINI
MEMORY LIGHTING CONTROL
OPERATOR'S HANDBOOK
CHAPTER 6
PROGRAMMABLE EFFECTS PANEL
6.1 INTRODUCTION
The Gemini Programmable Effects Panel allows the operator to set-up and
control complex automatic lighting effects. It may be set-up to control
both individual channels and, in conjunction with the Sub- master stores,
complete memories. An effect may be one of several types (e.g. Chase,
Flash, Sound-to-light, Lightning, Pseudo-random Flash) and may include
instructions to load new memories into the Sub-masters or to synchronise
the effect with the start of a fade on a Playback. Each effect may be
executed a specific number of times, may be set to run for a defined time,
or may continue until stopped, either manually or by the start of a fade
on a Playback. Up to 99 separate effects may be recorded and up to ten
different effects may be performed simultaneously.
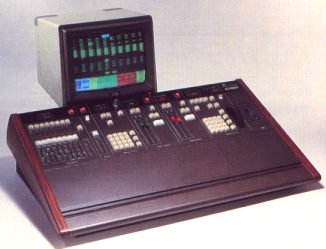
6.1.1 Controls
The effects controls comprise a keypad and display for the selection of
effect numbers, lighting channels, etc.; four cursor control keys; eight
keys (A-H) corresponding to the eight Sub-master faders; manual Chase
and Flash controls; and Audio (Sound-to-light) controls. The output of
the effects system is under the overall control of a MASTER fader and
effects may be started and stopped using GO and STOP buttons. An ENABLE
switch allows the A-H buttons to be used for manually controlled flash
effects.
Once running an effect may be speeded-up or slowed-down by a RATE;
control, and a SEQ (Sequence) button allows the next effect to be preselected
automatically.
The Effects panel operates in two modes, normal and Set-up, controlled
by the SET-UP button at the top right of the panel. When in normal mode,
effects may be selected on the keypad, and started and stopped as required.
When in Set-up mode, the VDU display changes to allow the entry of effects
information which is then stored in one of 99 Effects memories.
6.1.2 EFFECTS SET UP Display
Pressing the SET UP EFFECT button changes the Video Mimic display to the
following:
EFFECTS SET UP |
|
FUNCTION - EFFECT EFFECT NO. SOURCE EFFECT NO. |
EDIT |
This display permits the selection of the principal Effects Set-up options, i.e. the Effects Editor, Print Effects, Effects to Disc, Effects from Disc (to memory) and Delete Effects. The Effect numbers displayed will always initially be the same as that shown in the Effects keypad display window.
6.1.3 Principle of Operation
In order to use the various Effects Set-up facilities, the operator enters
information into 'fields' on the Video Mimic display. These fields are
of two types: those which have preset options (referred to in this description
as Option Fields); and those which are intended for the entry of times,
memory numbers, etc. (Data Fields).
The various fields are selected by moving a 'cursor' around the screen,
using the four cursor control keys ('A', 'v', '<' and '>') to the
right of the Effects keypad. The selected field is indicated by being
displayed in inverse video and, where appropriate (i.e. in Data Fields),
the position of the cursor within the field is shown by a co Loured block.
Information entered into or changed within a field does not take effect
until the cursor Leaves that field; this is particularly important, as
changing certain fields will delete or reset others.
The options available within each Option Field are selected by means of
the 'SEL' (Select) key on the Effects keypad. An Option Field always displays
one of its available options and pressing 'SEL' will step through these,
returning eventually to that initially shown; it is not possible to select
an invalid option. If the SEL key is operated while a Data Field is selected,
the system alarm will sound.
Information is entered into Data Fields by using the Effects keypad and
the A to H keys. Only valid data can be entered, the system alarm sounding
either if an invalid entry is attempted or on attempting to leave the
field, depending on the nature of the error. Existing data can be changed
by overtyping, or cleared by operating
the 'CL' key; the '<I and I>' keys allow the operator to move the
cursor within the field.
6.1.4 Entering Times
Some Data Fields require the entry of time; this is done in a similar
way to Wait times on the main Control Console. Any time between a and
59 minutes 59 seconds may be entered, as follows:
i) Times up to 100 seconds may be entered as two digits; e.g. for a time
of 45 seconds enter '4', '5'. On Leaving the Data Field, this will be
automatically converted to minutes and seconds if appropriate. If tenths
of seconds are required, these must be separated from the seconds by a
decimal point;
e.g. for a time of 5.7 seconds enter '5', '.' (point), '7'.
ii) Times longer than 1 minute may be entered as three or four digits;
e.g. for time of 5 minutes 30 seconds enter '5', '3', '0'. If the number
of seconds is greater than 59, these will be converted to minutes and
seconds as before. As in the case of seconds, tenths of seconds may be
entered following a decimal point.
If a time greater than 59 minutes 99 seconds is entered the message 'FIELD
ERROR' will appear at the bottom of the Effects display (on the same Line
as the 'COMMAND' field) and the system alarm will sound. Times between
59 minutes 59 seconds and 59 minutes 99 seconds will be automatically
reduced to 59 minutes 59 seconds.
6.2 SETTING-UP OR EDITING AN EFFECT
The Effects Editor is selected by operating the SET UP EFFECT button and
then selecting the EDIT option in the 'FUNCTION - EFFECT' Option Field.
As this option is always pre-selected on entry it is normally only necessary
to operate the 'v' button (to the right of the keypad) to make the selection.
Note: Effects can only be Set-up or Edited if the Memory Lock keyswitch
is in the OPEN position. If it is not, they can only be previewed (see
section 6.3.5).
As mentioned in section 6.1.2, the numbers in the 'EFFECT NO.' and 'SOURCE
EFFECT NO.' Data Fields will initially be that shown in the Effects keypad
display window. These may be changed if required, as follows:
i) Change only the Effect number (or Leave it unchanged).
The new number will be copied to the Source Effect number on exit from
the field. This permits an existing effect to be modified or used as a
basis for a new effect. Valid Effect numbers are from 1 to 99.
ii) Carry out the above and then enter a different number into the 'SOURCE
EFFECT NO.' Data Field.
The parameters for the Source Effect will used as a basis for the new
effect.
iii) Enter a valid number into the 'EFFECT NO.' field, but clear the 'SOURCE
EFFECT NO.' field.
The selected effect will be reset to the default state described in the
next section.
On using the 'v' button to exit from the 'SOURCE EFFECT NO.' Data Field,
the display will change to allow the selected effect to be set-up.
6.2.1 Effects Editor
The default Effects Editor display is shown below:
As can be seen from the above, the display is divided into six sections,
five of which have a number of Option and Data fields. Note that the bottom
section of the Video Mimic screen does not change, but continues to shown
the status of the various sections of the main control panel.
The most important field on the display is the 'EFFECT TYPE' Option Field
in the top left corner; five options are available: CHASE, FLASH, AUDIO,
LIGHTNING and FLICKER. The remaining fields vary according to which of
these options is selected and will be
described in the following paragraphs.
6.2.2 Types of Effect
6.2.2.1 Chase
A chase is an effect which has a number of steps taking place one after
the other; each step has an associated group of lights (see section 6.2.3.11)
which are faded to a preset maximum level. As each step occurs, one group
of lights is faded down, to be replaced by a new group. A Chase may have
any number of steps, up to a maximum of 255.
6.2.2.2 Flash
A Flash effect has only two groups of lights, an ON group and an OFF group.
When the effect is running, the system will flash between the two groups.
6.2.2.3 Audio
The Audio effect allows the operator to set-up three groups of lights
which are assigned to the BASS, MID and TREBLE frequencies respectively
of an audio input. The SOURCE switch on the Effects control panel permits
the selection of the Left- or Right-hand channels of a stereo input, or
of a pseudo-random flicker generator.
6.2.2.4 Lightning
The Lightning effect causes a single group of lights to flash randomly
for a pre-determined period each time a trigger occurs.
6.2.2.5 Flicker
The Flicker effect has eight random flicker generators to which groups
of lights may be assigned.
6.2.2.6 Cycle
The Cycle effect is similar to Chase, but permits separate up- and down-fade
times to be set.
6.2.3 General Description of Option
The various options available in each field are common to most effect
types. Each field is described below.
6.2.3.1 STEP TYPE (Chase, Flash, Lightning and Cycle
only)
Determines what triggers the transition from one stage of the effect to
the next. Note that the MANUAL, BEAT and SYNC options are not available
if CYCLE is selected.
| Option | Function |
| MANUAL (not cycle) | Each stage of the Effect must be performed by operating the appropriate STEP button on the Effects panel. In the case of Lightning, an additional Data Field (TIME) appears (in the 'STEPS' section of the display) into which the required flash period must be entered; the FLASH-STEP button is then used as a trigger. |
| BEAT (not Cycle) | The Effect is controlled by the Bass frequencies of an audio input. In the case of Lighting, the period must be entered as described above. |
| SYNC (not Cycle) | A Step Rate may be set using the appropriate STEP button; this will continue if the button is held down until the next step has occurred; this is particularly useful for disco effects, where the same Chase or Flash may be used with records at different tempi. In the case of Lightning, the period must be entered as described for MANUAL. |
| AUTOMATIC | The Effect is controlled by the timing data (Chase, Flash entered in the STEPS section of the display. and Cycle only) Chase: For each group of lights, the time before
the next step occurs may be entered in the 'TIME' field (which appears
in the 'STEPS' section of the display) and a fade up/down time may
also be set. The latter is entered into the 'SLOPE %' field) as
a percentage of the TIME value; see section 4.2.2 for details of
how to enter percentages. Flash: In this case a time may be set for the complete Flash cycle ('TIME' field) and a Mark-space ratio from 0 to 9 ('M-S RATIO' field). As in the case of CHASE, the settings of the appropriate controls will be used as default settings if nothing is entered into these two fields. Cycle: Cycle is similar to Chase, but has two 'SLOPE %' fields, 'UP' and 'DN'. If nothing is entered into the 'TIME' field, a default value will be calculated from the current settings of the CHASE and RATE controls. |
| VARIABLE (Chase, Flash and Cycle only) | The Step Rate is controlled by the appropriate control (i.e. CHASE or FLASH) on the Effects panel. In the case of Chase and Cycle, fade-up and fade-down times may be set in the 'SLOPE %' field (see above), while in the case of Flash, the Mark/Space ratio may also be varied, using the appropriately labelled control. |
6.2.3.2 CHANNEL LEVEL
This Data Field permits the operator to set a nominal level between, 0
and 100 (Full) for all individual channels taking part in the effect;
channels assigned to the SIJb-masters will be unaffected. The default
value is 100.
6.2.3.3 START EFFECT
This Option Field permits the operator to select whether the effect will
always be started manually using the GO button (MANUAL) or whether the
start will be synchronised with the recall of a particular memory, either
directly to the output or on one of the Playbacks (PLAYBACK). If PLAYBACK
is selected, an additional Data Field for the number of the required memory
appears to the right of the 'START EFFECT' field.
Note that if 'PLAYBACK' is selected, the effect will start on recall of
the memory concerned regardless of the current selection on the effects
keypad; the effect may, however, still be started manually by pressing
the GO button.
In the case of fades performed in Manual mode (i.e. with the appropriate
MANUAL indicator illuminated) the effect will not start on recall of the
memory concerned, but will wait until the fade is 'collected' - see section
4.6.2.4.
Up to ten effects may be in progress at the same time. These will normally
all be different, but it should be noted that it is possible to start
the same effect several times; this will result in a number of identical
effects running simultaneously, but out of phase with each other. This
possibilty must particularly be borne in mind when editing effects and
testing them immediately by using the GO button (see section 6.2.3.12).
6.2.3.4 IN TIME
The 'In Time' is the time taken for the lights taking part in an effect
to fade from zero to full; in the case of individual channels, this time
will be proportionally reduced if a level less than 100 has been set in
the 'CHANNEL LEVEL' field. The time is
entered as described in section 6.1.2.1.1. Note that channels concerned
combine with the output of the main console on a 'Highest-takes-precedence'
basis.
6.2.3.5 END EFFECT
The field is similar to the 'START EFFECT' field, but determines what
will cause the effect to terminate. The available options are as follows:
| Option | Function |
| MANUAL | The effect must be terminated by operating the STOP button on the Effects control panel. |
| TIMED | The effect will end automatically when a preset tlme has elapsed. The tlme is entered lnto an additional Data Field which appears to the right of the' END EFFECT' field on leaving the 'END EFFECT' field. |
| COUNT | The effect will end after a number of complete cycles. As in the case of TIMED, an additional Data Field appears to allow the number of cycles to be entered. |
| PLAYBACK | The effect will end when a particular memory is recalled either directly to the output or on either of the Playbacks (as in the case of START EFFECT, Manual fades must be 'collected'). An additional field appears to allow the memory number to be entered. |
Note that if 'TIMED', 'COUNT' or 'PLAYBACK' is selected, the effect may still be terminated manually by pressing the STOP button.
6.2.3.6 FINAL STATE
This Option Field allows the operator to determine whether, when the effect
is terminated, the lights taking part will fade out (OFF) or remain in
their finishing states, whatever these may be (ON). If 'OFF' is selected,
a fade-out time may be entered into the 'OUT TIME' Data Field (see section
6.2.3.7); with 'ON' selected, the latter has no purpose and therefore
disappears from the display.
6.2.3.7 OUT TIME
The function of this field is described in the previous section. Note
that when the effect is stopped, the 'GO' indicator will remain illuminated
until the OUT TIME has elapsed.
6.2.3.8 CONCLUSION
This field offers two options, 'IMt1EDIATE' and 'CYCLE' (note that this
is not the same as the CYCLE Effect Type). In the former case, when terminated,
the effect will always stop immediately. In the latter, however, the result
depends on which option is selected in 1 the 'END EFFECT' field. If 'TIMED'
or 'PLAYBACK' is selected, the :
effect, if terminated normally, will continue to run until the end of
the current cycle. Pressing the STOP button, whether MANUAL is selected
or not, will always stop the currently selected effect immediately. If
'COUNT' is selected, the effect will, by definition, always run to the
end of a cycle (see section 6.2.3.5).
6.2.3.9 NEXT EFFECT
The 'NEXT EFFECT' Data Field appears when an STEP TYPE other than 'MANUAL'
is selected. It allows the operator to 'chain' effects together, the effect
whose number is displayed in the field starting automatically as the current
one ends (at the start of any 'OUT TIME'). The facility is inoperative
if there is no 'NEXT EFFECT' number or if the STOP button is used to terminate
all effects simultaneously.
6.2.3.10 Preload
If required, pre-selected memories may be automatically Loaded into the
eight Sub-master stores at the start of an effect, the numbers of the
memories required being entered into the eight Data Fields (A to H) in
the 'PRELOAD' section of the Effects display.
If the memory number is preceded by '+' or '-', the new memory will combine
with the lighting already present in the Sub-master store (see section
4.4.2). Combinations of memories may also be pre- loaded; enter the numbers
of the memories concerned, separated by '+' or '-' as required; the memories
will combine on loading as
described in section 4.4.2.3. If the 'PRELOAD' field is Left blank, the
contents of the Sub-master store will be Left unchanged.
Unlike the normal method of recalling memories to the Sub-masters, Effects
Pre-Load does not include the Gang-Loading facility. If a range of memories
is entered using the THRU button, the 'FIELD ERROR' message will appear
and system alarm will sound on attempting to leave the field concerned.
If a number of memories is to be combined for Pre-Load and the available
field space is exceeded, the field concerned will 'scroll' sideways to
allow the entry to continue.
6.2.3.11 Groups
Under the heading 'GROUP' in the 'STEPS' section of the display are the
Data Fields into which the channel groups for each step in the effect
are entered. The information entered may consist of combinations of channel
numbers and the Letters A to H, the latter representing the corresponding
Sub-master stores.
Note: The effects system is primarily intended to be used in conjunction
with the Sub-master stores, the Preload facility being used to recall
pre-recorded memories at the start of each effect. Although individual
channel numbers may be entered, this should not be done if the effect
required can be achieved using the Sub-masters. Running an effect which
controls a Large number of individual channels directly may result in
increased system response time.
In addition to the above, using a Sub-master rather than individual channels
gives added flexibility, as,the channels concerned may each be set to
a different Level in the Sub- master store. Where individual channels
are used, a maximum Level may be set, but this will be the same for all
the channels used.
The contents of several Sub-masters may be combined into a group using
the '+' key, and individual channels may be formed into groups using the
'+', '_I and THRU keys. If a group is prefixed '+' or '_I, the Sub-masters
and channels concerned will be added to or subtracted from the group assigned
to the previous step. The THRU key may not be used when producing groups
of Sub-master stores; if this is done, the error alarm will sound on attempting
to Leave the field concerned.
If complex combinations of Sub-masters and channels are entered, the Effects
Editor will rationaLise the display to avoid confusion; for instance,
entering '1 THRU 10 - 6' will result in the display '- 1>10-6', but
on Leaving the field, the display will change to '1>5+7>10'.
6.2.3.12 COMMAND Field
There are three ways of leaving the Effects Editor. The first way is to
use the 'v' key to move the cursor to the bottom of the display and into
the 'COMMAND' Option Field. This field has three options, RECORD, CONTINUE
and ABORT: the RECORD option causes the effect to be recorded in the memory,
the display changing to 'EFFECTS SET UP'; the tONTINUE option allows the
operator to continue editing the currently selected effect; and the ABORT
option allows the operator to exit from the editor without recording the
effect. On Leaving the 'COMMAND' field, the currently selected option
will be actioned.
The second way of leaving the Effects Editor is to operate the SET-UP
button. This can only be done if the contents of the currently selected
field are valid and will cause the option currently displayed in the 'COMMAND'
field to be actioned. It will also result in a direct return to the normal.
Video Mimic display (that selected on the main Gemini control panel).
The third way to Leave the Effects Editor is to start the effect concerned
using the 'GO' button. This will have the same effect as pressing SET-UP
followed by 'GO'.
6.3 USING EFFECTS
Many ways in which effects may be used have been described in the previous
paragraphs. This section covers the controls which have not yet been described
and the interaction of the Effects system with the rest of the Gemini
controls.
6.3.1 Sequence
The 'SEQ' (Sequence) button on the Effects Panel operates in a similar
way to those on the main control panel. The button is alternate action,
the associated indicator lighting when Sequence mode is selected.
When the SEQ indicator is illuminated, starting an effect (whether manually,
using the GO button, or automatically, by recalling a memory or as a result
of a pre-programmed 'NEXT EFFECT') will cause the next effect which has
been recorded to be selected automatically, its number being displayed
in the window above the effects keypad. The number displayed will always
be that of the effect which has the next higher number relative to the
effect which has just started; if, however, the highest numbered effect
recorded is started, the sequence will start again at the beginning.
Note: The next effect is only selected ready for use; if a number of effects
are to follow each other automatically, the NEXT EFFECT facility must
be used (see section 6.2.3.9).
6.3.2 Audio Controls
The only controls not so far described which allow manual control as part
of an effect are the Audio controls at the top of the Effects panel. These
consist of three FREQUENCY gain controls (BASS, MIDDLE and TREBLE) and
a three position SOURCE selector switch. The latter permits the audio
input to be taken from the left- and right-hand channels of a stereo signal,
or from a pseudo-random flicker generator.
6.3.3 Manual Override
In addition to the various manual control options which may be selected
when an effect is set-up, there are four ways in which effects which are
already in progress may be controlled:
1) The effect selected on the keypad may be stopped by operating the STOP
button. Any NEXT EFFECT will then start automatically.
2) ALL effects may be stopped by clearing the keypad display and pressing
STOP. Note that in this case, any NEXT EFFECT instructions will be ignored.
3) The maximum intensity of the channels taking part in the effects may
be adjusted by means of the Effects MASTER fader. Reducing the fader to
zero will fade all effects out completely.
4) The effects may be speeded up or slowed down by means of the RATE control.
The associated indicator is coloured green if the speed is as programmed,
but red if it has been changed.
Note that 3 and 4 above will affect all effects which are in progress.
Adjustments can only be made to individual effects if they have been programmed
to allow this. In addition to the above, any effect, even if programmed
to start automatically on recall of a memory, may be started by selecting
its number on the Effects keypad and pressing the GO button.
6.3.3.1 Sub-master Faders
As described in section 6.2.3.11, the effects system is primarily intended
to be used in conjunction with the Sub-master stores. Once I a Sub-master
store has been Loaded with a memory, its output can be controlled by both
the corresponding fader (subject to the setting of the A-H fader) and
the Effects system, the two interacting on a
highest-takes-precedence basis. For this reason, the A_H fader should
normally be set to zero when the Effects panel is in use. If required,
however, the A-H fader may be raised above zero and the the Sub-master
faders used to determine a minimum setting for their assigned channels.
Individual channels under effects control are only subject to the Effects
MASTER fader setting and will not be affected by adjustment of the Sub-master
or A-H faders, except as determined by the highest-takes-precedence rule.
6.3.3.2 Flash buttons
In addition to their use when setting-up an effect (see section 6.2.3.11),
the A to H keys may be used to flash the contents of the Sub-master stores.
A switch above the buttons allows them to operate in three different ways:
1) FLASH
When the switch is in the FLASH position, pressing one of the buttons
will flash the contents of the corresponding Sub-master store to their
stored Levels (subject to the setting of the MASTER fader). This Level
will be retained until the button is released.
2) KILL
In this case, the effect will be to reduce all the channels in the corresponding
Sub-master store to zero while the button is operated. The effect is the
same as setting a Sub-master fader at full Level into inhibit mode (see
section 4.7.7).
3) LATCH
When the switch is set to LATCH, the effect is the same as FLASH, except
that the channels concerned will remain On when the button is released.
A second operation will then reverse the process. ALL eight Sub-masters
may be unlatched at once by
pressing the 'CL' button on the Effects keypad or by operating the ENABLE
switch.
The above functions may be inhibited to prevent accidental operation by
setting the ENABLE switch beside the 'H' key into the up position. They
are also inhibited while setting-up effects.
6.3.3.3 Previewing an Effect
There are two ways in which an effect may be previewed before use:
1) If the Memory Lock keyswitch is in the LOCK position, operating the
SET-UP button will cause the Video Mimic to show the Effects Editor display
for the currently selected effect. A second operation will return the
display to that selected on the Channel Control.
2) The LED indicators above the A to H buttons mimic the outputs of the
corresponding Sub-master stores (under effects control). If the MASTER
fader is set to zero, these indicators may be used to preview an effect,
without changing the Lighting on stage.
6.3.4 PRINTING EFFECTS
A printout of the Effects Editor display for any effect may be produced
by pressing SET-UP and then using the 'SEL' button to select the effects
PRINT option. Note that the Memory Lock 'v' button to exit from the 'LAST
EFFECT' field, the printout will commence. While the print is in progress,
the message 'PRINT IN PROGRESS' will appear on the Video Mimic and the
indicator above the PRNT button on the main control panel will light.
The printout may be terminated at any time by pressing the PRNT button.
6.3.5 SAVING EFFECTS ON DISC
Effects may be copied to and from disc by operating the SET-UP button
and then selecting either the 'TO DISC' or the 'FROM DISC' option. Note
that in either ca5e the Memory Lock keyswitch must be in the OPEN position,
as the required EFFECTS SET UP display cannot otherwise be selected.
The starting and finishing numbers of the required range of effects should
then be ehtered into the appropriate fields. On using the 'v' button to
exit from the 'LAST EFFECT' field, the disc action will commence. While
this is in progress, the message 'DISC IN PROGRESS' will appear on the
Video Mimic and the indicator above the appropriate disc action button
on the main control panel will light. If this button is operated while
the associated indicator is illuminated the disc action will terminate
once the current effect has been copied.
Details of disc care, etc. are given in section 48.1.
6.3.6 DELETING EFFECTS
This facility is similar to those described above. Press the SET-UP button
and then operate the 'SEL' button until 'DELETE' appears in the 'FUNCTION
- EFFECT' Option field. The starting and finishing numbers of a range
of effects should then be entered into the appropriate Data fields. On
using the 'v' key to leave the 'LAST EFFECT' field the effects will be
deleted.